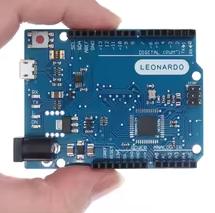
ARDUINO UNO R3 (ATMEGA328P AU)
The Ultimate Beginner-Friendly Microcontroller Board
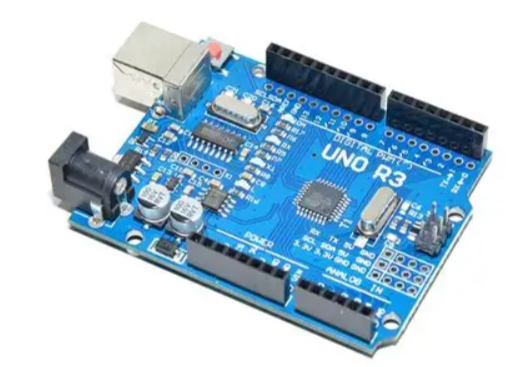
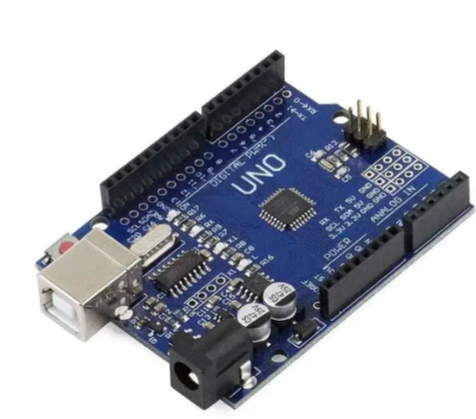
The Arduino Uno R3 is the world's most popular development board, featuring the powerful ATMEGA328P AU microcontroller. Perfect for beginners and professionals alike, this board serves as the foundation for thousands of projects, from simple LED blinkers to complex robotics and IoT systems.
Works with Windows, Mac OS X, and Linux - no additional drivers needed for most systems
Ideal for both prototyping and permanent installations
Always use the 5V pin carefully - it bypasses the voltage regulator
Technical Specifications
| Parameter | Value |
|---|
| Microcontroller | ATMEGA328P AU (SMD version) |
| Operating Voltage | 5V |
| Input Voltage (recommended) | 7-12V |
| Input Voltage (limits) | 6-20V |
| Digital I/O Pins | 14 (6 provide PWM output) |
| Analog Input Pins | 6 |
| DC Current per I/O Pin | 40 mA |
| Flash Memory | 32 KB (0.5 KB used by bootloader) |
| SRAM | 2 KB |
| EEPROM | 1 KB |
| Clock Speed | 16 MHz |
| USB Interface | ATmega16U2 (HID-capable) |
= Key Features =
OpenSource Hardware Complete design files available for customization
ATmega16U2 USB Interface - Supports HID functionality (keyboard/mouse emulation)
Fully Compatible - Works with all Arduino shields and accessories
Multiple Power Options USB, DC jack, or Vin pin (712V recommended)
Reset Button - Easy program restart without power cycling
3.3V Output Supports lowervoltage sensors and modules
= Applications =
- Educational projects and STEM learning
- Robotics and automation systems
- Sensor data logging and monitoring
- Home automation and IoT devices
- Wearable technology prototypes
- Art installations and interactive displays
- 3D printer control boards
- Drone and RC vehicle controllers
= Technical Details =
The ATMEGA328P AU is the surface-mount version of the popular ATMEGA328P microcontroller. Key technical advantages include:
- 16 MHz crystal oscillator for precise timing
- 5V operating voltage with built-in regulator
- ISP header for direct programming without USB
- 6 analog inputs with 10bit resolution (01023)
- PWM output on pins 3, 5, 6, 9, 10, and 11
- Hardware serial (UART) on pins 0 (RX) and 1 (TX)
- I2C interface on A4 (SDA) and A5 (SCL)
- SPI interface on pins 10 (SS), 11 (MOSI), 12 (MISO), 13 (SCK)
What's Included in the Box
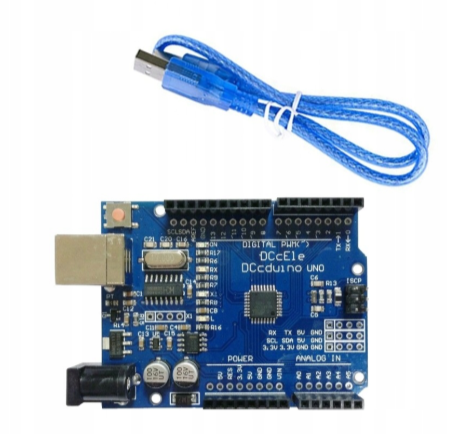
- Arduino Uno R3 Board (ATMEGA328P AU)
- USB A to B Cable (approximately 50cm)
- Male Pin Header Set (for soldering if not pre-soldered)
Some variants may come with presoldered headers check product listing for details
Why Choose Arduino Uno R3?
Largest Community Support - Millions of tutorials, examples, and forums available
Extensive Library Ecosystem Thousands of prewritten libraries for sensors, displays, and more
Shield Compatibility - Hundreds of expansion boards available
BeginnerFriendly No prior programming experience required
Reliable Design - Proven hardware with years of testing
Affordable Costeffective entry point into the world of electronics
√ Compatible with Arduino IDE (Version 1.8.0 and newer)
√ Works with Arduino Cloud and Arduino IoT services
√ Supports C/C++ programming with simplified syntax
√ Features automatic reset - no need to press reset button before uploading
√ Includes TX/RX LEDs for visual debugging
√ Power LED indicates when board is receiving power
√ Pin 13 LED for simple testing without any components
Getting Started in 3 Easy Steps
- Download the Arduino IDE from the official Arduino website
- Connect your Uno R3 using the included USB cable
- Upload your first sketch try the builtin Blink example
Use the builtin LED on pin 13 for your first test no components needed
Always select the correct board and port in the Arduino IDE before uploading
Power Options
| Power Source | Voltage Range | Notes |
|---|
| USB Port | 5V (regulated) | Recommended for programming and testing |
| DC Jack | 7-12V (recommended) | Provides 5V output through regulator |
| Vin Pin | 7-12V | Bypasses reverse polarity protection |
| 5V Pin | 5V (regulated) | Direct power - bypasses regulator |
| 3.3V Pin | 3.3V (regulated) | For low-voltage sensors and modules |
!! Do NOT power the board through both USB and DC jack simultaneously - use only one power source at a time
Maximum current available from 5V pin is approximately 400mA (when powered via USB)
Pin Diagram Reference
| Pin | Function | Description |
|---|
| 0 | RX | Serial receive (UART) |
| 1 | TX | Serial transmit (UART) |
| 2 | Digital I/O | Interrupt capable |
| 3 | Digital I/O | PWM capable |
| 4 | Digital I/O | - |
| 5 | Digital I/O | PWM capable |
| 6 | Digital I/O | PWM capable |
| 7 | Digital I/O | - |
| 8 | Digital I/O | - |
| 9 | Digital I/O | PWM capable |
| 10 | Digital I/O | SS (SPI), PWM capable |
| 11 | Digital I/O | MOSI (SPI), PWM capable |
| 12 | Digital I/O | MISO (SPI) |
| 13 | Digital I/O | SCK (SPI), built-in LED |
| A0 | Analog Input | - |
| A1 | Analog Input | - |
| A2 | Analog Input | - |
| A3 | Analog Input | - |
| A4 | Analog Input | SDA (I2C) |
| A5 | Analog Input | SCL (I2C) |
| AREF | Reference | Analog reference voltage |
| RESET | Reset | Reset pin (active low) |
| 3.3V | Power | 3.3V output (50mA max) |
| 5V | Power | 5V output |
| GND | Ground | Ground connection |
| Vin | Power | Voltage input (7-12V) |
= Example Code: Blink LED =
void setup() {
pinMode(LED_BUILTIN, OUTPUT);
}
void loop() {
digitalWrite(LED_BUILTIN, HIGH);
delay(1000);
digitalWrite(LED_BUILTIN, LOW);
delay(1000);
}
This example blinks the builtin LED on pin 13 the perfect starting point for beginners.
Frequently Asked Questions
What is the difference between ATMEGA328P and ATMEGA328P AU?
The AU variant is the surfacemount version (SMD), while the standard ATMEGA328P is the DIP version (throughhole). Both have identical specifications.
Can I use 5V sensors directly?
Yes, the Uno R3 operates at 5V logic level. For 3.3V sensors, use the 3.3V pin for power and voltage dividers for signal lines.
What's the maximum current I can draw?
The 5V pin can supply approximately 400mA when powered via USB. When powered via the DC jack, the regulator can supply up to 500-800mA.
How do I reset the board?
Press the reset button, or send a 1200bps baud signal over the USB serial port to trigger a software reset.
√ Arduino Uno R3 is compatible with Arduino IDE 1.8.0 and newer
√ Includes built-in USB to serial converter (ATmega16U2)
√ Features automatic reset for seamless uploads
√ Backed by over 10 years of community support
√ Perfect for beginners, students, and professionals