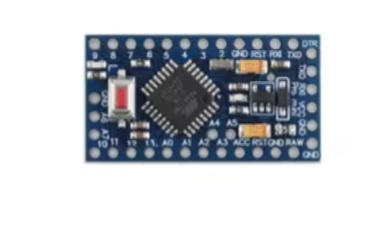
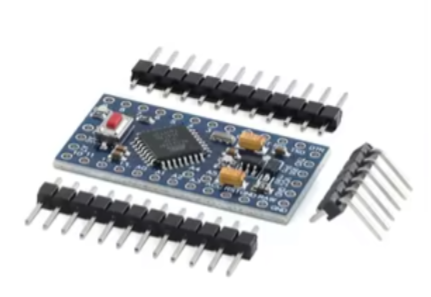
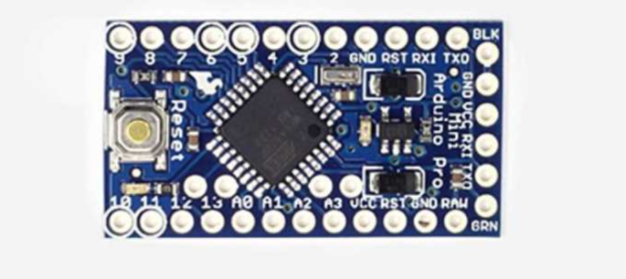
Arduino Pro Mini Development Board
Compact, Low-Cost Board for Embedded Projects
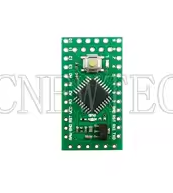
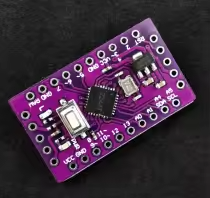
The Arduino Pro Mini is a compact, lowcost microcontroller board based on the ATmega328P, designed for users who want to embed the board in their projects permanently [citation:1]. It comes with the minimum components, no onboard USB or presoldered headers, to maximize flexibility and keep the cost down [citation:4]. This makes it a perfect choice for spaceconstrained and cost-sensitive applications.
Compact & LowCost Smallest Arduino board for permanent installation [citation:3]
ATmega328P Core - 32KB Flash, 2KB SRAM, 1KB EEPROM [citation:2][citation:10]
The board comes in two versions: *5V/16MHz and 3.3V/8MHz* [citation:1][citation:2].
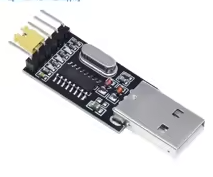
Requires an external USBtoTTL serial adapter (e.g., FTDI) for programming [citation:1][citation:8].
I/O pins operate at *3.3V or 5V logic* based on the version - check your model before connecting external components [citation:9].
Technical Specifications
| Parameter | 5V Version | 3.3V Version |
|---|
| :- | :- | :- |
| *Microcontroller* | ATmega328P [citation:2][citation:10] | ATmega328P [citation:2][citation:9] |
| *Operating Voltage* | 5V [citation:1][citation:10] | 3.3V [citation:1][citation:9] |
| *Clock Speed* | 16 MHz [citation:2][citation:10] | 8 MHz [citation:2][citation:9] |
| *Digital I/O Pins* | 14 (6 PWM) [citation:2][citation:10] | 14 (6 PWM) [citation:2][citation:9] |
| *Analog Input Pins* | 6-8 (depends on board) [citation:2][citation:4] | 6-8 (depends on board) [citation:2][citation:9] |
| *Flash Memory* | 32 KB (2 KB bootloader) [citation:1][citation:4] | 32 KB (2 KB bootloader) [citation:1][citation:4] |
| *SRAM* | 2 KB [citation:2][citation:10] | 2 KB [citation:2][citation:10] |
| *EEPROM* | 1 KB [citation:2][citation:10] | 1 KB [citation:2][citation:10] |
| *Dimensions* | 18 x 33 mm [citation:2][citation:9] | 18 x 33 mm [citation:2][citation:9] |
= Key Features =
Compact Size Excellent for wearable or spaceconstrained devices [citation:2]
Low Cost Minimal components make it affordable for oneoff projects [citation:1]
Fully ArduinoCompatible Uses standard Arduino IDE [citation:1]
RAW Pin Power Input Accepts 512V (5V board) or 3.3-12V (3.3V board) unregulated supply [citation:2][citation:7]
= Applications =
- Wearable electronics and portable devices
- Permanent installations and embedded projects
- Battery-powered applications (3.3V version recommended) [citation:9]
- Sensor data logging and monitoring
Ideal for Embedded Projects - Designed to be soldered permanently into a circuit [citation:3]
Choice of Voltage - 5V for common components, 3.3V for low power and modern sensors [citation:9]
√ Can be powered via RAW (5-12V) or VCC (regulated) pins [citation:7]
√ Programming is done via 6-pin FTDI header [citation:1]
√ Reset button included on most models [citation:3][citation:4]
Programming and Connection Guide
*Programming Setup [citation:1][citation:8]:*
- Connect an FTDI programmer to the 6-pin header (RXI, TXO, VCC, GND, DTR, BLK).
- In Arduino IDE, select the correct board variant: "Arduino Pro or Pro Mini (3.3V, 8 MHz)" or "Arduino Pro or Pro Mini (5V, 16 MHz)".
- Use external power on RAW or VCC when programming.
*Power Sources [citation:1][citation:7]:*
- *RAW*: Unregulated input (512V for 5V board, 3.312V for 3.3V board) through onboard regulator.
- *VCC*: Regulated power (exactly 5V or 3.3V), bypasses the regulator.
- *USB via FTDI*: Can power the board through the FTDI programmer.
To enable auto-reset with FTDI on Windows, enable "Set RTS on Close" in the device's port settings [citation:1][citation:8].
For 3.3V version, the board is popular for battery projects and interfacing with 3.3V sensors [citation:9].
Do not apply >12V on RAW pin, ensure correct voltage for your board variant [citation:1].
Troubleshooting
No response after upload:
- Ensure the correct board (5V vs 3.3V) is selected in the IDE [citation:1][citation:8].
- Check FTDI adapter connections (DTR must be connected for auto-reset) [citation:1].
- Verify external power is sufficient if powering through the RAW pin.
Board not powered:
- Verify the FTDI adapter is providing power or external power is connected.
- Check for correct connection: VCC to VCC, GND to GND [citation:1][citation:9].
- Avoid powering the board from both USB and RAW simultaneously.
Upload errors:
- Ensure the correct COM port is selected.
- Try pressing the reset button just before upload begins [citation:1].
- For clones, an older bootloader may require selecting "ATmega328P (Old Bootloader)" [citation:1].