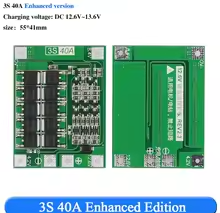
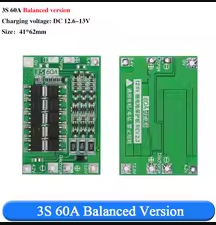
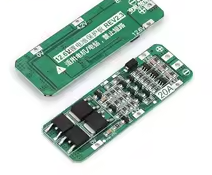
3S 40A Balanced BMS Lithium Battery Protection Board
High-Performance Battery Management System with Cell Balancing
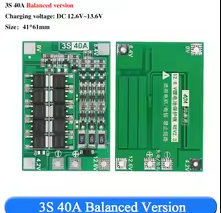
The 3S 40A Balanced BMS is a highperformance battery management system designed to protect and balance 3series lithiumion battery packs[citation:1][citation:6]. Featuring 40A continuous discharge current, 100mA balancing current, and auto recovery protection, this board provides comprehensive protection against overcharge, overdischarge, overcurrent, and short circuits[citation:3]. Perfect for power tools, electric drills, e-bikes, and DIY battery projects[citation:1].
Designed for 3.6V/3.7V Liion and LiPo battery cells (18650, 26650, polymer)
Supports 3S configuration with 12.6V full charge voltage
Not suitable for LiFePO4 batteries Liion/Li-Po only
Technical Specifications
| Parameter | Value |
|---|
| Battery Configuration | 3S (3 cells in series)[citation:2] |
| Supported Battery Types | Liion / LiPo (3.6-3.7V cells)[citation:5] |
| Full Charge Voltage | 12.6V - 13.6V[citation:7] |
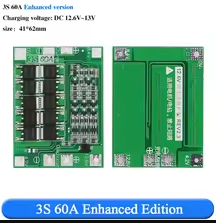
| Continuous Discharge Current | 40A[citation:9] |
| Continuous Charge Current | Up to 20A[citation:8] |
| Overcurrent Protection | 80A (starting current)[citation:3] |
| Balancing Current | ~100mA (passive balancing)[citation:3] |
| Overcharge Detection | 4.25V ± 0.025V per cell[citation:9] |
| Over-discharge Detection | 2.5V ± 0.08V per cell[citation:9] |
| Short Circuit Protection | Yes (auto recovery)[citation:5] |
| Static Current | < 24uA[citation:3] |
| Board Dimensions | ~41 x 55 x 3.4mm[citation:7] |
| Mounting | Through-hole pads |
= Key Features =
High Discharge Capacity - 40A continuous discharge with 80A overcurrent protection for demanding applications[citation:2]
Cell Balancing - 100mA passive balancing ensures cells remain at equal voltage for extended battery life and performance[citation:3]
Comprehensive Protection Overcharge, overdischarge, overcurrent, and short circuit protection with auto recovery[citation:1]
Auto Recovery - After short circuit or overcurrent protection, automatically recovers when load is removed[citation:5]
Low Standby Current - Only 24uA static current minimizes battery drain during idle periods[citation:3]
Wide Application Range Supports power tools up to 170W, ebikes, LED lights, and low-power inverters[citation:7]
= Applications =
- Power tools (electric drills, screwdrivers, sprayers)[citation:2]
- E-bikes and electric scooters[citation:1]
- Portable power supplies and generators
- LED lighting systems
- Low-power inverters and solar systems[citation:1]
- DIY battery pack builds
- Power banks and backup systems
- Industrial and automation equipment
Wiring Guide
| Connection | Description |
|---|
| B+ (Battery Positive) | Positive terminal of cell 3[citation:4] |
| B1 | Positive terminal of cell 1 (balance wire)[citation:4] |
| B2 | Positive terminal of cell 2 (balance wire)[citation:4] |
| B3 | Positive terminal of cell 3 (balance wire - also B+)[citation:4] |
| B- (Battery Negative) | Negative terminal of cell 1[citation:4] |
| P+ (Load/Charger Positive) | Positive output/charge input |
| P- (Load/Charger Negative) | Negative output/charge input |
> Connect in series: Cell 1: B- to B1, Cell 2: B1 to B2, Cell 3: B2 to B3[citation:4]
Use appropriate gauge wire for 40A current (minimum 3mm² copper wire)[citation:7]
Connect balance wires in strict order: B0 (B-) then B1 then B2 then B3 (B+)[citation:4]
Wiring Sequence
- Mark black cable as B0 (B-), red cables sequentially as B1, B2, B3 (B+)[citation:4]
- Solder B0 to battery pack total negative[citation:4]
- Solder B1 to connection between cell 1 positive and cell 2 negative[citation:4]
- Solder B2 to connection between cell 2 positive and cell 3 negative[citation:4]
- Solder B3 to battery pack total positive (cell 3 positive)[citation:4]
After wiring, measure voltage between adjacent cables with a multimeter to confirm correct voltage collection[citation:4]
Voltage difference of each string should not exceed 1V before connecting BMS[citation:4]
Always ensure correct voltage is detected before plugging in the BMS[citation:4]
How It Works
The 3S 40A Balanced BMS protects your battery pack through multiple mechanisms[citation:1]:
- *Overcharge Protection*: Detects when any cell exceeds 4.25-4.30V and disconnects charging[citation:3]
- *Over-discharge Protection*: Disconnects the load when any cell drops below 2.5V to prevent cell damage[citation:9]
- *Overcurrent Protection*: Monitors current flow and disconnects during short circuits or excessive loads[citation:1]
- *Cell Balancing*: Passive balancing equalizes cell voltages during charging to maintain pack health[citation:1]
- *Auto Recovery*: After a fault condition is resolved, the BMS automatically reconnects the circuit[citation:5]
The BMS uses passive balancing discharges highervoltage cells through "430" resistors (heating up to about 1.29W) to match lower-voltage cells[citation:3]
For optimal performance, use matched cells with similar capacity and internal resistance - "2 good battery + 1 poor battery = 3 poor batteries"[citation:3]
The board will not function if balance wires are connected incorrectly - follow wiring order carefully
Installation Tips
- *Cell Matching*: Use cells from the same batch with similar voltage before assembly[citation:3]
- *Balance First*: Connect all balance wires in correct order before connecting main leads
- *Awaken BMS*: After wiring, connect a charger to activate the BMS before first use
- *Heat Management*: For continuous high-current operation, ensure adequate cooling and airflow[citation:2]
- *Wire Gauge*: Use minimum 3mm² copper wire for main power connections (do not use nickel strips)[citation:7]
Before assembly, ensure all cells have similar voltage (within 0.1V) for optimal balancing[citation:3]
Mount the BMS on a flat, non-conductive surface away from heat sources
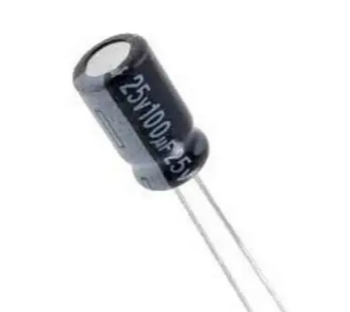
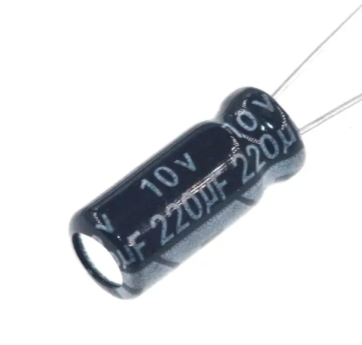
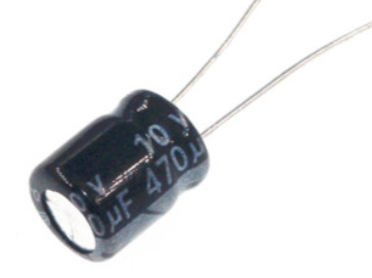
For brushed motor loads, connect a nonpolar capacitor (25V+, 10100uF) to prevent reverse spikes from damaging the MOS tube[citation:2]
Why Choose 3S 40A Balanced BMS?
High 40A discharge capacity for demanding power tool applications[citation:1]
100mA passive balancing extends battery pack lifespan[citation:3]
Auto recovery after fault conditions reduces maintenance[citation:5]
Comprehensive protection ensures safe operation[citation:1]
Compact 41x55mm design fits standard battery pack configurations[citation:7]
Suitable for drills with starting current up to 80A and power below 170W[citation:7]
√ Compatible with all 3.6V/3.7V Liion and LiPo cells[citation:2]
√ Supports 18650, 26650, and polymer battery formats[citation:3]
√ Direct replacement for standard battery management systems[citation:6]
√ Easy installation with clear wiring labels
√ Proven reliability for DIY and professional use
Safety Precautions
Do not use with LiFePO4 batteries only Liion/LiPo (3.63.7V per cell)[citation:2]
Do not exceed 40A continuous discharge current[citation:3]
Ensure correct polarity and wiring order 0V, 4.2V, 8.4V, 12.6V[citation:2]
Keep away from moisture and flammable materials
Use only with appropriate charger (12.6-13.6V for 3S)[citation:7]
Do not short circuit output terminals[citation:2]
Ensure adequate ventilation for heat dissipation
The BMS should be mounted in a protected area away from physical damage
For applications exceeding 40A continuous, consider a higher-current BMS model
Using a brushed motor? Connect a nonpolar capacitor (25V+, 10100uF) across motor terminals to prevent reverse spikes from damaging the MOS tube[citation:2]
The 3S 40A Balanced BMS provides reliable battery protection and management with integrated cell balancing for your 3series Liion battery packs. With comprehensive protection features, passive balancing, and auto recovery, it is the ideal solution for power tools, e-bikes, portable devices, and DIY battery projects[citation:1][citation:3].
BMS 3SBMS 40ABMS BALANCEDBMS BATTERYMANAGEMENT LITHIUMBATTERY POWERTOOLS EBIKE DIY BATTERYPROTECTION LI-ION 18650 #BATTERYPACK New Best Seller 3S BMS